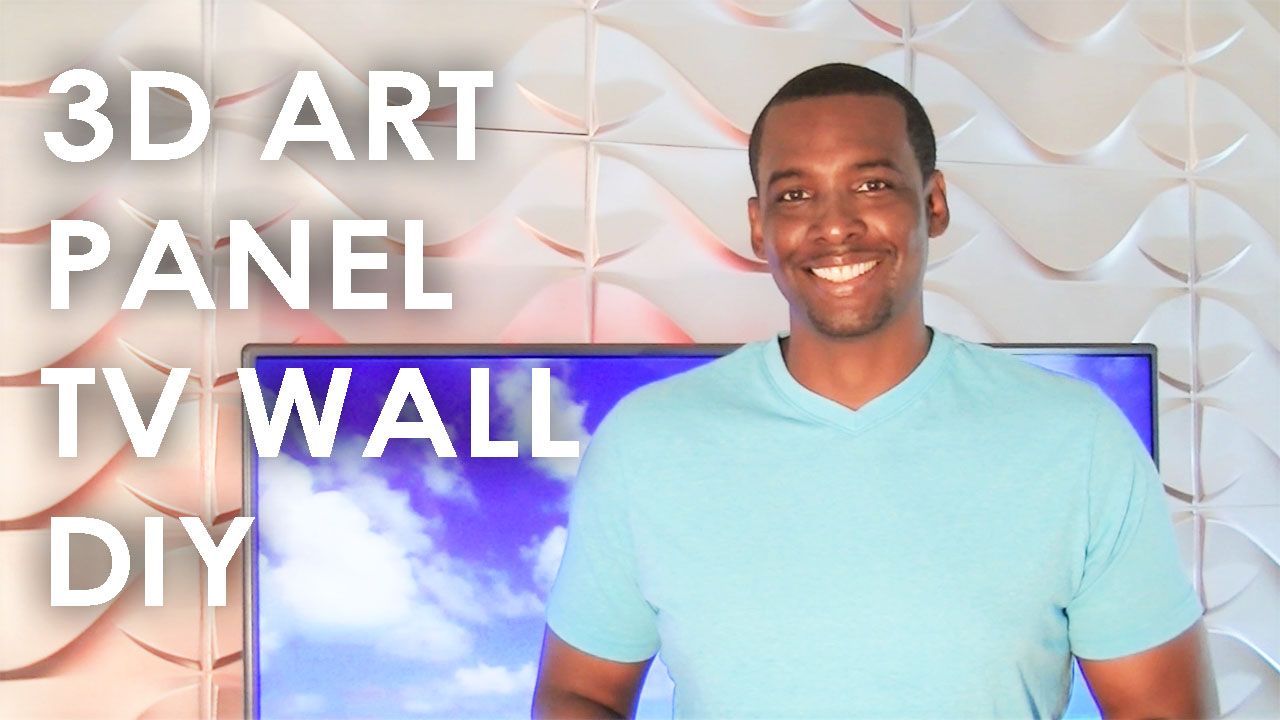
Ready for a DIY using 3D BoardArt Panels? Here are the steps my husband and I took to build a TV wall and change the look of our family entertainment center. Our goal was to give it a more theater feel and make use of the high wall space due to vaulted ceilings. Like most DIY projects, our makeover had to be budget friendly! This was also the first time we ever built something from wood for our home! There were a few mistakes along the way, but we learned from them and are ready to share this project with you! If you prefer a visual, check out this YouTube video: 3D ART PANEL TV WALL DIY. You will be amazed at what your imagination can create!
DIY Skill Level: MEDIUM – this is a 2 person project
All materials were purchased from our local home improvement store and Amazon. For your convenience, links are provided to the products that were purchased online. Here is our list of project purchases and approximate costs:
- 3D BoardArt Panels (2 boxes of 12 panels each) – $30 – $60 per box depending on style http://amzn.to/2vJG3Tr
- Luminoodle TV and Monitor Bias Lighting for a 50” TV – $25
http://amzn.to/2x5TOM0
- 2”x 3.5” 8ft wood posts (4) – $12
- 4’x 4’ underlayment panels (4) – $36
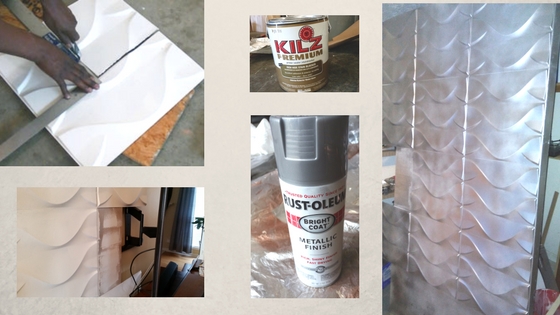
- Spray primer (2 cans) – $18
- Premium primer ( 1 gal) – $25
- Loctite power grab glue – $4
- Metallic spray paint (5 cans) -$20
- Black spray paint (1 can) – $4
- Wood marker – $6
- Velcro – $3
Here are tools we already had:
- L-shaped framing square
- Hand saw
- Power drill and wood screws
- Face mask
- Wood cleaning supplies
- caulk gun
Step One: Transform Old Console
The idea was not to spend money to purchase a new television console unit, but to use funds to makeover our existing one. The latter allowed us to do much more with less. First, we removed the side towers from our old entertainment system. This required us to remove all the components and outdated stash of VHS movies and tape cassettes that were hidden deep in the wooden fortress. (Yay! This project caused us to declutter!) The new configuration included the installation of a swivel TV mount and sound bar. Note: Be sure to check the TV owner’s manual and select the recommended mount manufacturer. Not all “universal” mounts fit all TVs – this is a lesson we learned.
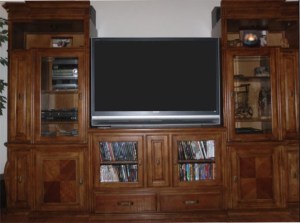
Old TV Console
Our newly re-created TV console measured about 9.5 feet across. Due to the high ceiling, we wanted our backdrop to be at least 6 feet high and cover the length of the new console. We had an idea to make two separate backdrops that join in the center. Each side of the backdrop would slide in and out for easy accessibility to connections in the back of the TV. That was the extent of our customized dimensions.
Step Two: Build Backdrop
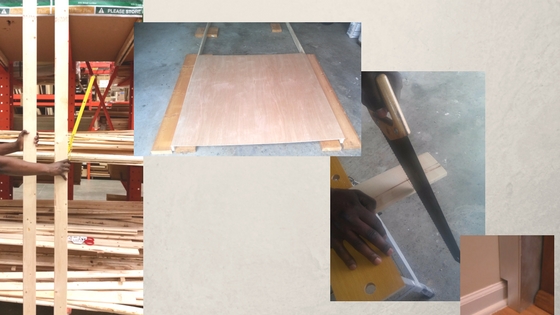
Now it was time to visit our local home improvement store and check out the wood section. We saw 2”x 3.5” wood posts that were 8ft tall. Perfect! There was also a 4’x4’ underlayment that we could foresee attaching to the posts. Using scrap paper, we drew a version of our backdrop frame based on the dimensions of the pre-cut wood findings. We decided our backdrop would use two (2) 8ft posts that would stand approximately four feet apart with two (2) 4’x 4’ underlayment pieces for each side of the backdrop. In total, four posts plus four underlayment pieces. Before leaving, we picked up some glue and paint.
Construction time! Since the backdrop needed to lay flush against the wall, we cut out a notch at the bottom of the posts to clear for the baseboards. The underlayment was then screwed onto the wood posts.
Step Three: Add 3D Art Panels
After comparing textured wallpaper options, we decided on 3D BoardArt panels to feature on the backdrop. A few reasons for this choice were its sound proofing characteristics, texture, and the ability to paint and personalize the look. Plus, we wanted to try something we never worked with before. There are definitely pros and cons to that decision. Lol!
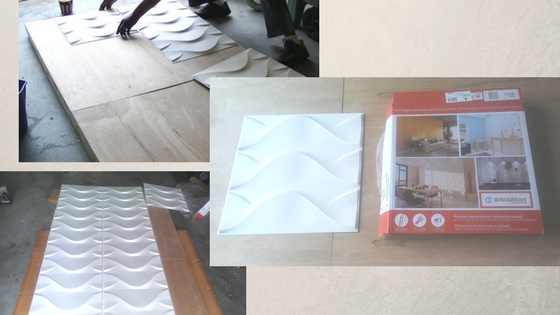
While sticking the panels to the underlayment, we realized we were using way too much glue. Excess seeped out from around the panel edges when pressed down. We learned that construction glue must be wiped off immediately and that paint does not cover its sticky residue. If we had been more careful, we probably could have skipped priming a second time before painting. Panels now had to be carefully scraped to remove dried residue without damaging the surface. In the end, we had to prime twice.
Step Four: Cut Out Opening for TV Mount
The 3D BoardArt panels were approximately 20 inches wide and our backdrop was approximately 48 inches wide for each side. When we glued three panels across the top of one side, the 3rd panel had an overhang of about 12 inches. The overhang was perfect to allow for the top panels to join and still have an opening space for the TV mount in the middle. One side of the backdrop became 60 inches across so the total width would be 10ft once both sides were joined together! Height wise, we tiled the panels on the underlayment down to approximately 1.5 feet from the bottom. Two reasons: TV console was slightly taller than two feet to cover the bare underlayment and (more importantly) we did not have enough panels to cover the entire underlayment to reach the floor.
One side of the backdrop was brought in to measure the panel that would fit around the TV mount. We used a L-shaped framing square to cut out a customized opening. Now the focus was to duplicate the backdrop for the other side. However, notches, overhanging panels and openings needed to be reversed. No problem. The second (left) side backdrop was much easier to construct due to our right side experiences.
Step Five: Prime and Paint
The first round of priming was done with a spray primer. Unfortunately, the light coat did not cover all the residue left in the seams on the right side of the backdrop. When we tried to use the metallic silver paint on a small section, the silver paint would not adhere to any spots of remaining residue. We decided to use a thicker primer and apply it with a paint roller. Thankfully, this solved the problem. When we built the second side of the backdrop, we reduced the glue and did not use any caulk between the 3D BoardArt panels. The second (left) side only required one coat of the thicker primer before spraying with metallic silver paint.
Step Six: Secure Panels
Both sides of the backdrop were joined together once they were painted and dried. Velcro was used to connect the overhanging panels. This allowed the panels to hang flush with each side. The Velcro allowed for easy disconnection of the two sides of the backdrop. This was beneficial for accessing TV cords. In the future, we may decide to relocate the entertainment center. Both sides of the TV wall backdrop can conveniently move with it.
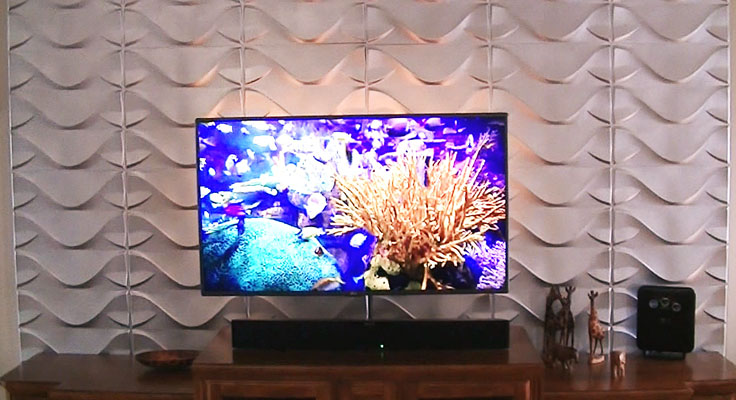
SPECIAL NOTE: Hubby decided to add LED lighting to enhance our new entertainment center. He used a Luminoodle product that was easy, quick and affordable. Check out this video if you are interested to see how to add colorful ambient lighting to your TV: Easy LED Light DIY Install for $25
Step Seven: Finish Touch-ups
Next, we touched up scratches and scuffs on the renovated console with a wood marker. Wood cleaning and polishing products were used to bring out its natural shine. Lastly, we painted the knobs to change up the look.
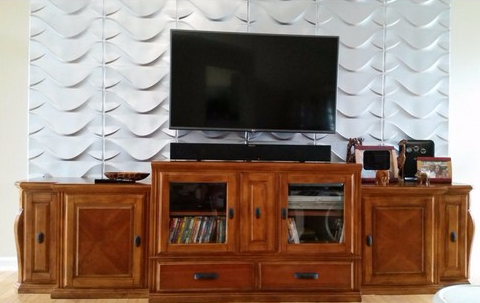
Overall, we were pleased at how our first 3D BoardArt panel backdrop DIY turned out. This TV wall project sparked our imagination as to what other uses these panels could be used for. Please share if you have some ideas!
If this DIY was helpful, please share this blog post and YouTube video with your friends! I would love to hear your comments and I am always grateful for your “likes” and support!


 Are you a leader in your community, business, church, home, or workplace? Are you looking for a more effective leadership style? Leadership is often associated with power. It requires taking action that others willingly follow. In the best case scenario, there is a forward action with positive results for all.